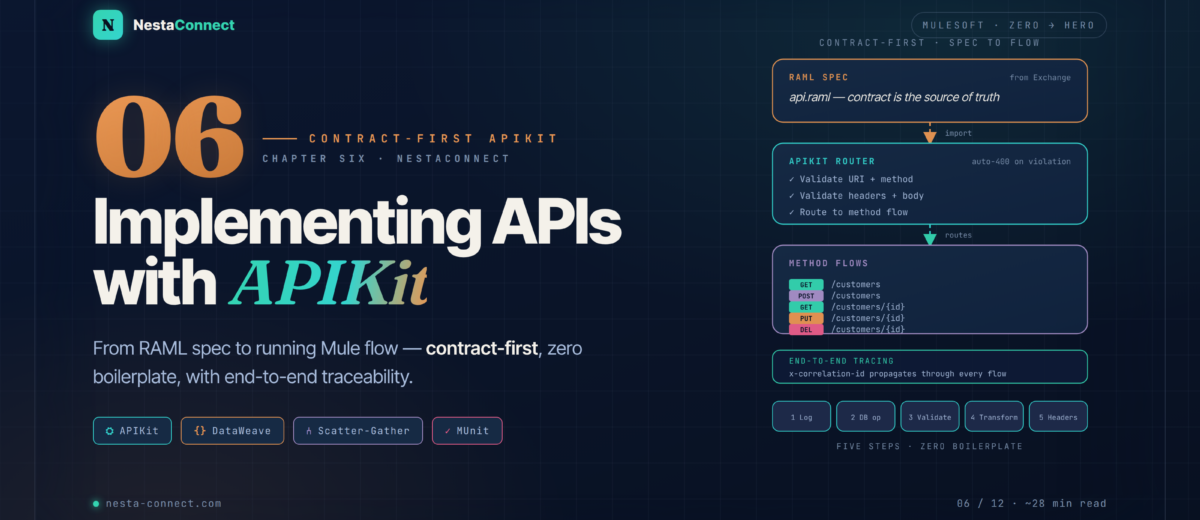
From RAML spec to a running Mule application — APIKit Router, generated flows, CRUD with DataWeave, end-to-end correlation, a global error envelope, and a real-world scatter-gather case study.
In Chapter 5B you designed a beautiful API contract. A contract alone doesn’t serve data, though — it’s time to bring that API to life inside Anypoint Studio. This chapter is the complete spec → working flow walkthrough using APIKit, MuleSoft’s toolkit for turning specifications into Mule flows with zero routing boilerplate. You’ll wire correlation-ID propagation, implement five CRUD endpoints against a PostgreSQL database, replace the default error handlers with a consistent envelope, and finish with a real-world scatter-gather pattern that parallelises three data sources into a single response.
The companion repo carries a complete Studio project for this chapter — customer-api-impl with all generated flows, the global error handler, MUnit tests, and a separate order-mgmt-api project demonstrating the scatter-gather case study end to end.
By the end of this chapter you will:
- Understand what APIKit generates and why you must never modify the router flow
- Import a RAML spec from Exchange and scaffold a complete Mule project in under a minute
- Wire
x-correlation-idpropagation once — make every log line traceable end-to-end - Implement five CRUD endpoints with DataWeave and the Database connector
- Replace APIKit’s default error handlers with a global
ApiResponseenvelope - Parallelise three data sources with Scatter-Gather (300 ms sequential → ~120 ms parallel)
- Test with the embedded API Console, Postman, and MUnit with mocked databases
01 · APIKit — What APIKit Actually Does
APIKit is a MuleSoft connector that automates two things that are painful to do by hand: HTTP request routing and contract enforcement. When a request arrives, APIKit inspects URI, method, headers, and body against your RAML or OAS spec before any of your business logic runs. If the request doesn’t match the contract, APIKit rejects it with a 400 Bad Request automatically — you never write that validation code.
Real-world impact: A large European bank running API-led connectivity reported a 60% reduction in integration boilerplate when migrating from hand-coded HTTP listeners to APIKit. Their contract-first workflow meant front-end teams could start building against mocks on Day 1 while back-end teams implemented the flows — both shipping in parallel.
api.raml on app start and uses it as the single source of validation truth.APIKit ships two components you’ll work with:
- APIKit Router — inspects every incoming request, validates against the loaded RAML/OAS spec, and routes to the correct flow. Returns
400 Bad Requestautomatically for malformed requests (wrong content-type, missing required body fields, invalid URI params). - APIKit Console — an embedded interactive documentation portal (like Swagger UI) served at
/console/*. Lets you exercise every endpoint directly from the browser with a real API call — perfect for smoke tests.
Without APIKit, you’d write a Choice router to dispatch POST /customers vs GET /customers, then validate Content-Type manually, then validate every required body field. APIKit does all of that from your RAML spec — one component replaces dozens of lines of defensive code. APIKit overview docs →
02 · Import — From Exchange to Studio Project
We’ll use the Customer Management API we designed in Chapter 5. The spec is already published in Exchange, so we import it from there — this ensures Studio always pulls the latest published version with all its fragments and dependencies resolved.
What APIKit generates — the complete project structure
After the import completes, expand the project in Package Explorer. You’ll see this layout:
customer-api-impl/
├── src/main/
│   ├── api/                          # your RAML spec + fragments
│   │   ├── api.raml                  # root spec (read-only once imported)
│   │   ├── types/customer.raml
│   │   └── exchange_modules/…         # pulled fragments — never edit
│   ├── mule/
│   │   └── customer-api-impl.xml     # ALL generated flows live here
│   └── resources/
│       └── log4j2.xml                # logging config
├── src/test/
│   └── munit/                         # MUnit tests go here
└── pom.xml                           # Maven dependencies (apikit, db, etc.)
Inside customer-api-impl.xml, APIKit generates these flows automatically:
| Generated Flow Name | Purpose | Your Job |
|---|---|---|
customer-api-main | HTTP Listener + APIKit Router — entry point | Configure HTTP port/host only |
get:\customers:…-config | Stub for GET /customers | Add DB query + transform |
post:\customers:…-config | Stub for POST /customers | Add DB insert + transform |
get:\customers\(id):…-config | Stub for GET /customers/{id} | Add DB query + 404 logic |
put:\customers\(id):…-config | Stub for PUT /customers/{id} | Add DB update + transform |
delete:\customers\(id):…-config | Stub for DELETE /customers/{id} | Add DB delete + 204 |
get:\console:…-config | APIKit Console at /console/* | Leave as-is |
customer-api-400 | Auto-generated 400 handler | Customise response shape |
customer-api-404 | Auto-generated 404 handler | Customise response shape |
customer-api-500 | Auto-generated 500 handler | Customise response shape |
Never modify the customer-api-main flow or the router configuration. All your business logic goes inside the method flows (the ones named get:…, post:…, etc.). This way, if the spec changes and you regenerate the router, you don’t lose your implementation.
03 · Tracing — Wire x-correlation-id First
Before implementing any business logic, add the correlation ID handler. This goes in the customer-api-main flow, right after the HTTP Listener and before the APIKit Router. Every flow that runs downstream — every Logger, every DB call, every error handler — will then have vars.correlationId available.
<flow name="customer-api-main">
  <http:listener config-ref="customer-api-httpListenerConfig"
                 path="/api/*">
    <http:response statusCode="#[vars.httpStatus default 200]"/>
  </http:listener>

  <!-- 1. Resolve correlation ID — incoming header or fresh UUID -->
  <set-variable variableName="correlationId"
                value="#[attributes.headers['x-correlation-id'] default uuid()]" />

  <!-- 2. Tag every log line with it -->
  <logger level="INFO"
          message="#['[' ++ vars.correlationId ++ '] Inbound ' ++ attributes.method ++ ' ' ++ attributes.requestPath]"/>

  <!-- 3. Hand off to APIKit Router — do NOT modify -->
  <apikit:router config-ref="customer-api-config"/>

  <error-handler ref="customer-api-global-error-handler"/>
</flow>attributes.headers['x-correlation-id'] default uuid() is DataWeave. It reads the x-correlation-id request header; if it’s absent, uuid() generates a fresh UUID v4. The result lives in vars.correlationId for the rest of the request. Every Logger downstream should prefix its message with #['[' ++ vars.correlationId ++ ']'] — searching Anypoint Monitoring by that ID then reconstructs the full request chain across every API the request touched.
04 · CRUD — Implementing the Five Endpoints
Now we implement the business logic for each endpoint. All responses use the ApiResponse envelope from Chapter 5B (metadata + data separation). We’ll connect to a PostgreSQL database using the Database connector — the same pattern works for MySQL, Oracle, or any JDBC-compliant DB.
4.1 · GET /customers — list with pagination
<flow name="get:\customers:customer-api-config">

  <logger level="INFO"
          message="#['[' ++ vars.correlationId ++ '] GET /customers']"/>

  <!-- Paginated query -->
  <db:select config-ref="postgresConfig">
    <db:sql>
      SELECT id, name, email, phone, created_at
      FROM customers
      WHERE (:search IS NULL OR name ILIKE '%' || :search || '%')
      ORDER BY id LIMIT :lim OFFSET :off
    </db:sql>
    <db:input-parameters>#[{
      search: attributes.queryParams.search,
      lim:    (attributes.queryParams.limit  default 20) as Number,
      off:    (attributes.queryParams.offset default  0) as Number
    }]</db:input-parameters>
  </db:select>

  <set-variable variableName="rows" value="#[payload]"/>

  <!-- Count for pagination metadata -->
  <db:select config-ref="postgresConfig">
    <db:sql>SELECT COUNT(*) AS total FROM customers</db:sql>
  </db:select>

  <ee:transform>
    <ee:message>
      <ee:set-payload>#[%dw 2.0
output application/json
var total = payload[0].total
---
{
  metadata: {
    status:        "SUCCESS",
    level:         "INFO",
    timestamp:     now(),
    correlationId: vars.correlationId
  },
  data: {
    items: vars.rows map (row, i) -> {
      id:        row.id,
      name:      row.name,
      email:     row.email,
      phone:     row.phone,
      createdAt: row.created_at
    },
    pagination: {
      total:  total,
      offset: (attributes.queryParams.offset default 0) as Number,
      limit:  (attributes.queryParams.limit  default 20) as Number
    }
  }
}]</ee:set-payload>
    </ee:message>
    <ee:variables>
      <ee:set-variable variableName="outboundHeaders">
        #[{ "x-correlation-id": vars.correlationId }]
      </ee:set-variable>
    </ee:variables>
  </ee:transform>

</flow>
4.2 · GET /customers/{id} — single resource with 404 handling
<flow name="get:\customers\(id):customer-api-config">

  <db:select config-ref="postgresConfig">
    <db:sql>SELECT id, name, email, phone FROM customers WHERE id = :id</db:sql>
    <db:input-parameters>#[{ id: attributes.uriParams.id as Number }]</db:input-parameters>
  </db:select>

  <!-- 404 if no rows returned -->
  <choice>
    <when expression="#[isEmpty(payload)]">
      <raise-error type="APP:NOT_FOUND"
                   description="Customer not found"/>
    </when>
    <otherwise>
      <ee:transform>
        <ee:message>
          <ee:set-payload>#[%dw 2.0
output application/json
---
{
  metadata: {
    status:        "SUCCESS",
    timestamp:     now(),
    correlationId: vars.correlationId
  },
  data: payload[0]
}]</ee:set-payload>
        </ee:message>
      </ee:transform>
    </otherwise>
  </choice>

</flow>
4.3 · POST /customers — insert with envelope response
<flow name="post:\customers:application\json:customer-api-config">

  <!-- IMPORTANT: store body BEFORE the DB op (db ops overwrite payload) -->
  <set-variable variableName="requestBody" value="#[payload]"/>

  <db:insert config-ref="postgresConfig" autoGenerateKeys="true">
    <db:sql>
      INSERT INTO customers (name, email, phone)
      VALUES (:name, :email, :phone)
    </db:sql>
    <db:input-parameters>#[{
      name:  vars.requestBody.name,
      email: vars.requestBody.email,
      phone: vars.requestBody.phone
    }]</db:input-parameters>
  </db:insert>

  <set-variable variableName="httpStatus" value="#[201]"/>

  <ee:transform>
    <ee:message>
      <ee:set-payload>#[%dw 2.0
output application/json
---
{
  metadata: {
    status:        "SUCCESS",
    level:         "INFO",
    timestamp:     now(),
    correlationId: vars.correlationId
  },
  data: vars.requestBody ++ { id: payload.generatedKeys.GENERATED_KEY }
}]</ee:set-payload>
    </ee:message>
    <ee:variables>
      <ee:set-variable variableName="outboundHeaders">
        #[{
          "x-correlation-id": vars.correlationId,
          "Location": "/v1/customers/" ++ (payload.data.id as String)
        }]
      </ee:set-variable>
    </ee:variables>
  </ee:transform>

</flow>When autoGenerateKeys="true", the Database connector populates payload.generatedKeys with the auto-generated primary key after the INSERT. This is the correct way to retrieve a DB-generated ID in Mule 4 — no need for a separate SELECT. Works with PostgreSQL (RETURNING), MySQL (LAST_INSERT_ID), and Oracle (ROWID). DB Connector operations docs →
4.4 · PUT and DELETE — condensed
<flow name="put:\customers\(id):application\json:customer-api-config">
  <set-variable variableName="requestBody" value="#[payload]"/>

  <db:update config-ref="postgresConfig">
    <db:sql>
      UPDATE customers SET name=:name, email=:email, phone=:phone
      WHERE id=:id
    </db:sql>
    <db:input-parameters>#[{
      id:    attributes.uriParams.id as Number,
      name:  vars.requestBody.name,
      email: vars.requestBody.email,
      phone: vars.requestBody.phone
    }]</db:input-parameters>
  </db:update>

  <choice>
    <when expression="#[payload.affectedRows == 0]">
      <raise-error type="APP:NOT_FOUND" description="Customer not found"/>
    </when>
    <otherwise>
      <ee:transform>
        <ee:message>
          <ee:set-payload>#[output application/json ---
{ metadata: { status: "SUCCESS", correlationId: vars.correlationId },
  data: vars.requestBody ++ { id: attributes.uriParams.id as Number } }]</ee:set-payload>
        </ee:message>
      </ee:transform>
    </otherwise>
  </choice>
</flow>

<flow name="delete:\customers\(id):customer-api-config">
  <db:delete config-ref="postgresConfig">
    <db:sql>DELETE FROM customers WHERE id = :id</db:sql>
    <db:input-parameters>#[{ id: attributes.uriParams.id as Number }]</db:input-parameters>
  </db:delete>

  <choice>
    <when expression="#[payload.affectedRows == 0]">
      <raise-error type="APP:NOT_FOUND" description="Customer not found"/>
    </when>
    <otherwise>
      <set-variable variableName="httpStatus" value="#[204]"/>
      <set-payload value="#[null]"/>
    </otherwise>
  </choice>
</flow>
05 · Errors — The Global ApiResponse Error Handler
APIKit generates default error-handler flows automatically, but they return plain text or default JSON. Replace them with a single global handler that returns the ApiResponse envelope pattern — every error, whether from the framework or your code, now returns the same consistent shape.
<error-handler name="customer-api-global-error-handler">

  <!-- 400 — bad request / validation -->
  <on-error-propagate type="APIKIT:BAD_REQUEST,APIKIT:NOT_ACCEPTABLE">
    <set-variable variableName="httpStatus" value="#[400]"/>
    <ee:transform>
      <ee:message>
        <ee:set-payload>#[output application/json ---
{
  metadata: {
    status:        "ERROR",
    level:         "WARN",
    timestamp:     now(),
    correlationId: vars.correlationId
  },
  messages: [{
    code:        "CUST-4000",
    description: error.description default "Invalid request payload",
    retryable:   false
  }],
  data: null
}]</ee:set-payload>
      </ee:message>
    </ee:transform>
  </on-error-propagate>

  <!-- 401 — unauthorised -->
  <on-error-propagate type="HTTP:UNAUTHORIZED">
    <set-variable variableName="httpStatus" value="#[401]"/>
    <!-- … same envelope shape with code: CUST-4010 -->
  </on-error-propagate>

  <!-- 404 — not found -->
  <on-error-propagate type="APP:NOT_FOUND">
    <set-variable variableName="httpStatus" value="#[404]"/>
    <!-- … envelope with code: CUST-4040, description: "Customer not found" -->
  </on-error-propagate>

  <!-- 500 — anything else -->
  <on-error-propagate type="ANY">
    <set-variable variableName="httpStatus" value="#[500]"/>
    <logger level="ERROR"
            message="#['[' ++ vars.correlationId ++ '] ' ++ error.description]"/>
    <!-- … envelope with code: CUST-5000, retryable: true (scrub error.cause in prod) -->
  </on-error-propagate>

</error-handler>Reference this handler from every method flow by adding <error-handler ref="customer-api-global-error-handler"/> at the end of each flow. Alternatively, set it as the global default in your Mule app’s configuration so it applies everywhere automatically. The vars.httpStatus variable controls the response code — the HTTP Listener reads it via the statusCode attribute on its <http:response> child.
06 · Case Study — Scatter-Gather for an Order API
Let’s move to a more complex scenario. An e-commerce company needs an Order Management API. When a client calls GET /orders/{id}, the response must include the order details from the orders database, the line items from the order_items database, and the current price and availability of each product from a separate Product Catalog API. Three data sources, one response — this is a classic scatter-gather pattern.
Why scatter-gather? If you query each source sequentially (DB query 1 → DB query 2 → HTTP call), you stack the latency of all three. With scatter-gather, all three run in parallel. If each takes 100 ms, sequential = 300 ms; parallel = ~120 ms (overhead only). For high-traffic APIs, that’s the difference between a snappy product page and a slow one.
ApiResponse. End-to-end latency is bounded by the slowest route, not the sum.<flow name="get:\orders\(id):order-api-config">
<!-- Store URI param BEFORE scatter — each route gets its own message -->
<set-variable variableName="orderId" value="#[attributes.uriParams.id as Number]"/>
<scatter-gather timeout="5000">
<!-- Route 1: order header -->
<route>
<db:select config-ref="postgresConfig">
<db:sql>SELECT id, customer_id, status, total, created_at
FROM orders WHERE id=:id</db:sql>
<db:input-parameters>#[{ id: vars.orderId }]</db:input-parameters>
</db:select>
</route>
<!-- Route 2: line items -->
<route>
<db:select config-ref="postgresConfig">
<db:sql>SELECT product_id, quantity, unit_price
FROM order_items WHERE order_id=:id</db:sql>
<db:input-parameters>#[{ id: vars.orderId }]</db:input-parameters>
</db:select>
</route>
<!-- Route 3: product catalog (wrap in Try for partial-failure tolerance) -->
<route>
<try>
<http:request config-ref="productApiConfig"
method="GET" path="/products">
<http:headers>#[{ "x-correlation-id": vars.correlationId }]</http:headers>
</http:request>
<error-handler>
<on-error-continue>
<set-payload value="#[[]]"/>
</on-error-continue>
</error-handler>
</try>
</route>
</scatter-gather>
<!-- Merge results into the ApiResponse envelope -->
<ee:transform>
<ee:message>
<ee:set-payload>#[%dw 2.0
output application/json
var order = payload[0].payload[0]
var items = payload[1].payload
var products = payload[2].payload
---
{
metadata: {
status: "SUCCESS",
timestamp: now(),
correlationId: vars.correlationId
},
data: order ++ {
items: items map (item) -> do {
var product = products filter (p) -> p.id == item.product_id
---
{
productId: item.product_id,
productName: product[0].name default "Unknown",
quantity: item.quantity,
unitPrice: item.unit_price,
lineTotal: item.quantity * item.unit_price
}
},
total: sum(items map (i) -> i.quantity * i.unit_price)
}
}]</ee:set-payload>
</ee:message>
</ee:transform>
</flow>(1) Always store attributes.uriParams in a variable before scatter-gather — each route gets its own message context, and the original attributes aren’t available inside routes. (2) Wrap any HTTP route in a <try> with an on-error-continue so a downstream API failure doesn’t kill the entire response — return partial data with a WARN-level message instead. (3) Always set timeout="5000" (or whatever your SLA allows) to avoid unbounded waits when a downstream is slow. Scatter-Gather router docs →
07 · Testing — Three Levels of Verification
A complete test strategy for an APIKit implementation has three levels: the embedded console for quick smoke tests, Postman for contract validation, and MUnit for automated regression in CI/CD.
7.1 · API Console — smoke tests
Run the application (Run → Run As → Mule Application) and open http://localhost:8081/console. The embedded API Console renders your RAML spec as interactive documentation with a Try it button on every endpoint. This is the fastest way to verify a flow works after implementation — usually within seconds of saving the XML.
7.2 · MUnit — automated tests with mocked DB
<munit:test name="get-customers-returns-paginated-envelope"
            description="Happy path — DB returns rows, response is wrapped in ApiResponse">

  <munit:behavior>
    <!-- Mock the DB SELECT -->
    <munit-tools:mock-when processor="db:select">
      <munit-tools:with-attributes>
        <munit-tools:with-attribute attributeName="doc:name" whereValue="List customers"/>
      </munit-tools:with-attributes>
      <munit-tools:then-return>
        <munit-tools:payload value='#[[
          { id: 1, name: "Ada Lovelace", email: "ada@example.com", phone: "+44…" },
          { id: 2, name: "Alan Turing",  email: "alan@example.com", phone: "+44…" }
        ]]'/>
      </munit-tools:then-return>
    </munit-tools:mock-when>
  </munit:behavior>

  <munit:execution>
    <flow-ref name="get:\customers:customer-api-config"/>
  </munit:execution>

  <munit:validation>
    <munit-tools:assert-that
      expression="#[payload.metadata.status]"
      is='#[MunitTools::equalTo("SUCCESS")]'/>
    <munit-tools:assert-that
      expression="#[sizeOf(payload.data.items)]"
      is='#[MunitTools::equalTo(2)]'/>
    <munit-tools:assert-that
      expression="#[payload.metadata.correlationId]"
      is='#[MunitTools::notNullValue()]'/>
  </munit:validation>

</munit:test>
08 · Best Practices — The Implementation Checklist
| Practice | Why it matters | How |
|---|---|---|
| Never modify the router flow | Regenerating flows after spec changes will overwrite your work | All logic goes in method flows only |
| Set correlationId before the router | Makes every log line traceable end-to-end | <set-variable> before <apikit:router> |
| Store payload before DB ops | DB operations overwrite payload | <set-variable variableName="requestBody"…> |
| Use raise-error for 404 | Centralises error handling; flows stay clean | <raise-error type="APP:NOT_FOUND"…> |
| Always return ApiResponse envelope | Consistent contract — consumers parse one shape | DataWeave template in every <ee:transform> |
| Echo x-correlation-id in response headers | Clients need it for their own tracing | Set vars.outboundHeaders in transform |
| Mock DB in MUnit tests | Fast, deterministic, no infra dependency | munit-tools:mock-when on db:select |
| Use autoGenerateKeys on INSERT | Avoid an extra SELECT to get the new ID | Attribute on <db:insert> |
| Scatter-gather timeout | Prevents hanging requests when downstream is slow | timeout="5000" on <scatter-gather> |
09 · Recap — What You Built
Validates · routes · returns 400
Inspects URI, method, headers, and body against your RAML before your code runs. Auto-400 on every contract violation.
- Never modify the main flow or router
- Logic goes only in method flows
- Console at
/console/*— free with every spec - Regenerating preserves your method flows
One UUID, every log line
headers['x-correlation-id'] default uuid() before the router. Every Logger prefixes [correlationId].
- Echo back in response headers
- Forward to downstream HTTP requests
- Search Anypoint Monitoring by ID
- Available in every flow as
vars.correlationId
Log · DB · Validate · Transform · Headers
Five steps, every flow. Store payload before DB ops (overwritten). Use autoGenerateKeys for INSERT IDs.
raise-error APP:NOT_FOUNDfor 404 casesvars.httpStatuscontrols response code- DELETE returns 204 with
nullpayload - One DataWeave template for the envelope
One envelope for every failure
Global handler returns ApiResponse for 400 · 401 · 404 · 500. Every error carries correlationId and a domain code.
- 500s log ERROR with full description
- Scrub
error.causefrom 5xx in production - APIKit errors map to
messages[] - Wire once globally — applies everywhere
Parallel routes = bounded latency
DB + DB + HTTP all at once. Sequential 300 ms → parallel ~120 ms. payload becomes array [route1, route2, …].
timeout="5000"on every scatter-gather- Wrap HTTP routes in
<try>for partial failures - Store
uriParamsin a var beforehand - Merge in a single
ee:transform
Mock the DB, run in CI
Mock db:select with munit-tools:mock-when. One happy-path + one error case per endpoint = solid coverage.
- Assert envelope shape: status, messages[], data
- Always assert
correlationIdis not null - Run in CI/CD before every deployment
- Fast, deterministic, no infra dependency
The companion repo contains the complete customer-api-impl Studio project from this chapter, the order-mgmt-api scatter-gather case study, and a full MUnit test suite covering every endpoint × every error case. Clone, run mvn clean test, and you have a green build in under a minute.