
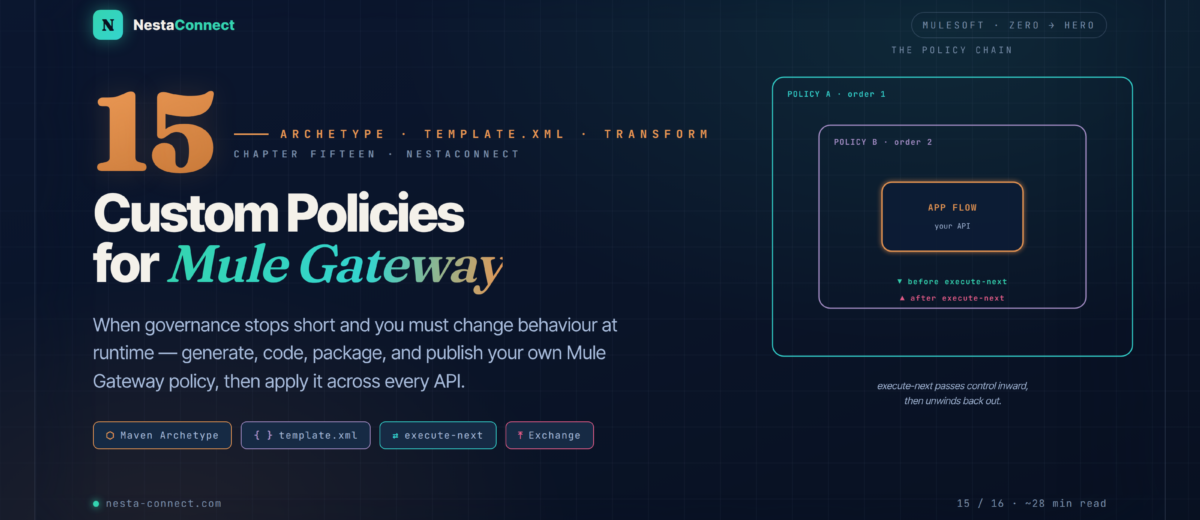
Governance tells you an API is out of line. A custom policy actually does something about it — at runtime, on every request. This is the complete build: from an empty folder to a policy live in Exchange and applied across your whole fleet.
In Chapter 14 you made the platform enforce standards — but governance only flags problems. It can’t rewrite a header, call your security service, or mask a field in a live response. For that you need to change behaviour at the gateway itself, and the out-of-the-box policies only go so far. This chapter is the part every serious MuleSoft team eventually reaches: writing your own policy, from scratch, the official way.
The companion repo carries a ready-to-build policy project: the archetype output, a template.xml with a guard and a response-header transform, a fully-annotated config YAML, and the Maven settings for publishing to Exchange.
By the end of this chapter you will:
- Configure Maven to reach MuleSoft’s archetype and Exchange repositories
- Generate a policy project and understand what every file is for
- Write policy logic in
template.xmland truly graspexecute-next - Define the config form API Manager shows, in YAML
- Modify requests and responses with the HTTP Policy Transform Extension
- Package, publish to Exchange, apply an API, and roll out fleet-wide with Automated Policies
- Study a real, production policy end to end: Treblle observability
01 · Why & How — The Four-Step Workflow
A custom policy is exactly what it sounds like: your own logic, injected into the gateway, applied to any API you choose. It can rewrite headers and payloads, add authentication, call an external system, log, cache, throttle — anything the Mule runtime can do. And the path from idea to running policy is always the same four moves.
02 · Setup — Teaching Maven Where to Look
You’ll need JDK 8, 11, or 17, Maven 3.8+, and an Anypoint account with an Exchange Contributor (or Administrator) role. You’ll also need your Organization ID — grab it from Access Management → Organization (it’s the UUID in the URL).
The one catch: the policy archetype isn’t on Maven Central. You have to point Maven at MuleSoft’s repository — and, while you’re in ~/.m2/settings.xml, add the Exchange credentials you’ll publish with.
<profiles>
  <profile>
    <id>archetype-repository</id>
    <repositories>
      <repository>
        <id>archetype</id>
        <name>Mule Repository</name>
        <url>https://repository.mulesoft.org/nexus/content/repositories/public</url>
        <releases><enabled>true</enabled><checksumPolicy>fail</checksumPolicy></releases>
        <snapshots><enabled>true</enabled><checksumPolicy>warn</checksumPolicy></snapshots>
      </repository>
    </repositories>
  </profile>
</profiles>

<!-- the server id must match the Exchange repository id in your pom.xml -->
<servers>
  <server>
    <id>exchange-server</id>
    <username>${anypoint.username}</username>
    <password>${anypoint.password}</password>
  </server>
</servers>settings.xml lives in your home directory, not your project — never commit Anypoint credentials to version control. In CI, inject them as masked environment variables or a secrets store, and confirm the account has permission to publish to Exchange before you try to deploy.
03 · Generate — Scaffolding the Project
With Maven configured, the archetype builds the whole skeleton for you. Make a directory, drop into it, and run the generator — activating the archetype-repository profile you just defined:
mkdir my-custom-policy && cd my-custom-policy

mvn -Parchetype-repository archetype:generate \
  -DarchetypeGroupId=org.mule.tools \
  -DarchetypeArtifactId=api-gateway-custom-policy-archetype \
  -DarchetypeVersion=1.2.0 \
  -DgroupId=${orgId} \
  -DartifactId=${policyName} \
  -Dversion=1.0.0 \
  -Dpackage=mule-policy

# add -DencryptionSupported=true to allow encrypted configuration values
Set ${orgId} to your Organization ID (the policy uploads there) and ${policyName} to the policy’s artifact name. Maven then prompts for a policyDescription and a policyName identifier — fill those in and the project is ready.
04 · The Four Files — What Each One Does
The archetype produces a deliberately small project. Four files, four jobs:
my-custom-policy/
├── my-custom-policy.yaml      # the config form shown in API Manager
├── mule-artifact.json         # policy descriptor for the packager
├── pom.xml                    # build + publish to Exchange
└── src/
    └── main/
        └── mule/
            └── template.xml   # the actual policy logic
pom.xml — the build. Its groupId is your org ID (leave it as generated), its packaging is mule-policy so the packager can build the JAR, and its distributionManagement points at your Exchange. The mule-maven-plugin packages the policy; the deploy plugin uploads both the JAR and the YAML.
mule-artifact.json — the descriptor the mule-maven-plugin needs, the same file a Mule app uses. One rule to remember: policies can’t export resources or Java packages, and they can’t use connectors that do (no Java or Spring modules).
my-custom-policy.yaml — the configuration UI. This is what renders the parameter form in API Manager. Skip it and your policy can’t be configured through the platform at all. (Section 7.)
src/main/mule/template.xml — the logic. By default the archetype writes a policy that simply sets the response to "Hello World!". Everything interesting you build here. (Section 5.)
05 · Anatomy — Inside template.xml
A policy is written directly in XML — no drag-and-drop — and it looks a little unfamiliar at first. Here’s the default the archetype generates, which is the smallest complete policy there is:
<mule xmlns="http://www.mulesoft.org/schema/mule/core"
      xmlns:http-policy="http://www.mulesoft.org/schema/mule/http-policy">

  <http-policy:proxy name="{{{policyId}}}-custom-policy">   <!-- (1) -->
    <http-policy:source>                                <!-- (2) -->
      <http-policy:execute-next/>                       <!-- (3) -->
      <set-payload value="Hello World!"/>
    </http-policy:source>
  </http-policy:proxy>
</mule>
Three elements carry the whole model:
- (1)
<http-policy:proxy>— the wrapper for every policy.{{{policyId}}}is a Handlebars variable the runtime substitutes when the policy is applied. A proxy holds asourceblock, anoperationblock, or both. - (2)
<http-policy:source>— logic for inbound traffic: it wraps what happens around the API’s HTTP Listener. - (3)
<http-policy:execute-next/>— the hinge. It hands control to the next policy (or the app flow). Everything before it runs on the way in; everything after runs on the way back out. Omit it and the chain stops dead — which is exactly how a policy blocks a request.
06 · execute-next — The Order of Everything
Once you internalize execute-next, policies stop being mysterious. Think of stacked policies as nested shells around your flow. A policy with a lower order sits on the outside; the flow is always in the very middle.
Position in source | Runs | Use it for |
|---|---|---|
Before execute-next | On the way in (request) | Auth checks, add request headers, validate, block |
After execute-next | On the way out (response) | Add response headers, transform/log the response |
Because skipping execute-next stops the chain, conditional access is just a <choice>: call it when the request is valid, and respond directly when it isn’t.
<http-policy:proxy name="{{{policyId}}}-guard">
  <http-policy:source>
    <choice>
      <when expression="#[!isEmpty(attributes.headers['authorization'])]">
        <http-policy:execute-next/>          <!-- valid → continue -->
      </when>
      <otherwise>                              <!-- invalid → never continue -->
        <http-transform:set-response statusCode="401">
          <http-transform:body>#['Missing Authorization header']</http-transform:body>
        </http-transform:set-response>
      </otherwise>
    </choice>
  </http-policy:source>
</http-policy:proxy>
07 · The Config UI — Parameters in YAML
The YAML file is how a policy becomes reusable. API Manager reads it and renders a form; whoever applies the policy fills in the fields. Each parameter you define here is available in template.xml via Handlebars — {{apiKey}}, {{maskKeywords}}, and so on. Here’s the shape, drawn from the real Treblle policy:
id: treblle-policy
name: Treblle API Observability
description: Logging, payload masking & observability via Treblle
category: Security
type: custom

providedCharacteristics:
  - Logs API traffic to Treblle
  - Masks sensitive data
requiredCharacteristics:
  - Requires HTTP protocol

configuration:
  - propertyName: apiKey
    name: API Key
    description: Your Treblle API key
    type: string
    mandatory: true
    sensitive: true            # hidden in the UI
  - propertyName: maskKeywords
    name: Mask Keywords
    description: Comma-separated fields to mask
    type: string
    defaultValue: email,password,token,ssn
    mandatory: false
  - propertyName: maskPayload
    name: Mask Entire Payload
    type: boolean
    defaultValue: false
mandatory: false| type | Renders as |
|---|---|
string | Text input |
boolean | Checkbox |
int / number | Number input |
enum | Dropdown |
object / array | Nested / repeatable config |
Any credential — API keys, tokens, passwords — should carry sensitive: true. API Manager then masks it in the form and stores it securely, instead of showing it in plain text to anyone who opens the policy configuration. Clear name and description fields aren’t cosmetic either: they’re the only guidance the next engineer gets.
08 · Transforming Traffic — The HTTP Policy Transform Extension
Reading requests is easy; changing them is what the HTTP Policy Transform Extension is for. It adds first-class operations for adding and removing request/response headers and rewriting the message. Add the dependency (the docs cover version 3.0.0 and later — use a current 3.x, not an old 1.x), and declare its namespace.
<dependency>
  <groupId>com.mulesoft.anypoint</groupId>
  <artifactId>mule-http-policy-transform-extension</artifactId>
  <version>3.0.0</version>          <!-- check for the latest 3.x -->
  <classifier>mule-plugin</classifier>
</dependency>
To stamp a header onto every response, run add-headers with outputType="response" after execute-next — because responses only exist on the way back out:
<mule xmlns="http://www.mulesoft.org/schema/mule/core"
      xmlns:http-policy="http://www.mulesoft.org/schema/mule/http-policy"
      xmlns:http-transform="http://www.mulesoft.org/schema/mule/http-policy-transform">
  <http-policy:proxy name="{{{policyId}}}-headers">
    <http-policy:source>
      <http-policy:execute-next/>                    <!-- run the flow first -->
      <http-transform:add-headers outputType="response">
        <http-transform:headers>#[{
          'X-Policy-Applied': 'true'
        }]</http-transform:headers>
      </http-transform:add-headers>
    </http-policy:source>
  </http-policy:proxy>
</mule>
Policies can reach outbound calls too. Alongside source, a proxy may hold an <http-policy:operation> block that wraps an HTTP Requester inside a flow — its own execute-next lets you inject headers before and after each outbound request, not just the inbound one.
09 · Ship It — Build, Publish, Apply
Two commands take you from source to a published asset. Package first — it produces the deployable JAR — then deploy, which uploads the JAR and the YAML to your org’s Exchange:
mvn clean package   # → target/my-custom-policy-1.0.0-mule-policy.jar
mvn clean deploy    # uploads the JAR + YAML to Exchange
Verify it landed: open Exchange, search by policy name, and confirm the version. To use it, go to API Manager → your API → Policies → Apply New Policy, pick your policy, fill in the form your YAML defined, and click Apply.
Applying a policy per API doesn’t scale past a handful. Automated Policies (API Manager → Automated Policies → Add) apply one policy, configured once, across every matching API — with a rule of application by runtime (all runtimes, a Mule version range, or specific Java versions). New APIs inherit it automatically. It’s the same “tag once, governed forever” idea from Chapter 14, applied to runtime behaviour: centralized config, consistent masking, one dashboard, near-zero maintenance.
10 · Case Study — The Treblle Observability Policy
Treblle ships an official Mule Gateway policy that gives teams full visibility into their APIs — real-time logging, auto-generated docs, and payload masking — without touching application code. It’s a perfect example of the pattern this whole chapter builds toward: intercept, observe, get out of the way.
Deploying it is the workflow you just learned, start to finish:
git clone https://github.com/Treblle/treblle-mulesoft.git
cd treblle-mulesoft

# set groupId in pom.xml to your Business Group ID, then:
mvn clean package
mvn clean deploy          # → appears in Exchange as "treblle-policy"
Apply it to one API from the Policies tab with your Treblle API Key and SDK Token, choose your masking keywords — or, to cover everything at once, add it as an Automated Policy. Every API, one configuration, one consolidated view of your entire API traffic.
11 · Recap — What You Now Know
Develop → package → publish → apply
Four repeatable steps take any idea from an empty folder to a policy applied on an API.
- Logic in
template.xml - JAR via Maven
- Published to Exchange
- Applied in API Manager
The archetype does the setup
Point Maven at MuleSoft’s repo, run the archetype, and get four purpose-built files.
api-gateway-custom-policy-archetype:1.2.0settings.xmlprofile + creds- yaml · json · pom · template
- Never commit credentials
The hinge of every policy
Before it runs inbound; after it runs outbound; skip it to block. Lower order = outer shell.
- A1 → B1 → F1 → B2 → A2
- Guard with
<choice> source= inboundoperation= outbound
YAML becomes the form
Parameters defined in YAML render in API Manager and reach the logic via Handlebars.
{{apiKey}}in template.xml- string · boolean · enum · …
sensitive: truefor secrets- No YAML = no UI
Change the traffic
The HTTP Policy Transform Extension adds and removes headers and rewrites messages.
- Use current 3.x, not 1.x
add-headers outputType="response"- Responses only after execute-next
- Outbound via
operation
Ship it everywhere
Package, deploy, apply — and use Automated Policies to cover every API from one config.
mvn clean package/deploy- Observe without latency
- Automated Policies for fleets
- New APIs inherit it
The companion repo has the whole policy project ready to build: the archetype output, a template.xml with a guard plus a response-header transform, an annotated config YAML, and the Maven settings for publishing to Exchange. Clone it, set your org ID, and you’re one mvn deploy from your first custom policy.